Instagram Feed

Sunday, January 1, 2017

2017 HUD


2017 Head's Up Display

  1. Take over the family business selling mobile home parts. Though it is not game related, it will take up most of my time. - Complete
  2. Learn to use 3D Printer my brother got me for Christmas - Complete
  3. Try out Bullet Journaling - Complete
  4. Learn to shoot a handgun - Complete
  5. Host Grill Drink Game Con 17 - Complete
  6. Take the grandkids to Disneyland! - Complete
  7. Board game list - Tried this year
    1. Pandemic: Legacy Season 1 - Awesome!
    2. Runewars Miniatures Game - Loved it!
    3. T.I.M.E. Stories - Makes my brain hurt figuring out the clues but amazing.
    4. Bridge, the old card game - Easy to learn, stinking hard to get good at the player interaction and bidding.
    5. Mansions of Madness - Loved the miniatures and the app that "runs" the game. I also liked the game mechanics. I found it to be heavily slanted to the players losing. I am not sure there is a legitimate way for the players to win. Would play again and would paint the miniatures but not really interested in buying it.
  8. Added - Paint Runewars - Oh my gosh I love this game!!
  9. Paint some Cygnar Miniatures
Last year's 2016 HUD, 2015 HUD, 2014 HUD,  2013 HUD and  2012 HUD.
SaveSave
SaveSave

Tuesday, November 8, 2016

Card Holder

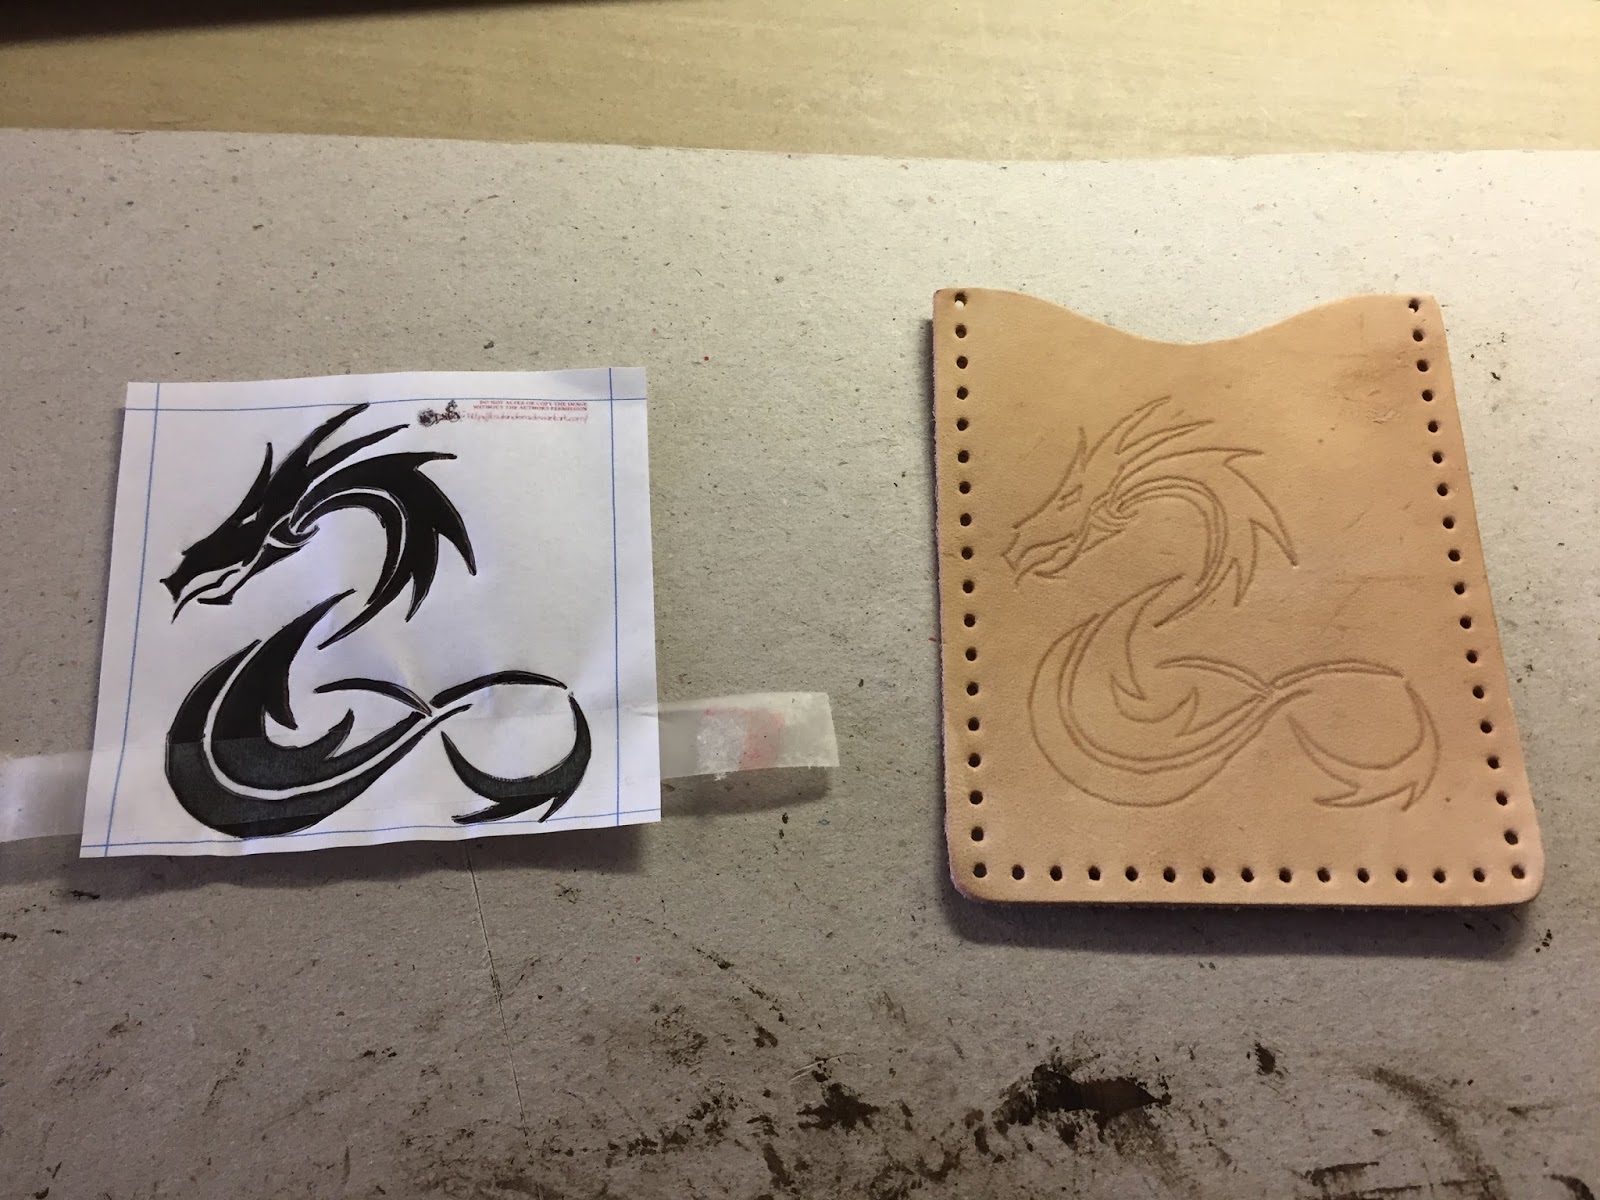
Found this dragon online.  I moved it to MS Word so I could scale it to the correct size. 
This is after I cut the pattern in with the swivel knife.

This is the pattern for the back side of the card holder.  It is the dragon's eye.

This is after the tooling.  I beveled the edges and used the backgrounder where I could.

This was all beveling.  I still want to work on smoothing out my lines when I "walk" the tool.

This is what it looks like when you smear the antique finish on.  I went on to cover the whole front of the leather.  Used Fiebing's Antique Finish Medium Brown.

I wrapped a ruler in a paper towel and wiped off the excess.  This allows the Antique to really sit down in the tooling.

Add caption


Following the directions in the kit, I tied the three layers together with the top knot.  Then, I started with a single needle and did a simple pinning stitch.  At the end, I started the running stitch back the other way.  A tip they mention is to make sure you come up on the same side of the stitch on every stitch.  I aimed for the outside edge as much as I could.

This is the finished project.  I hammered the stitching and burnished the edges. 
This is the other side.  The two little water spots went away when dry.

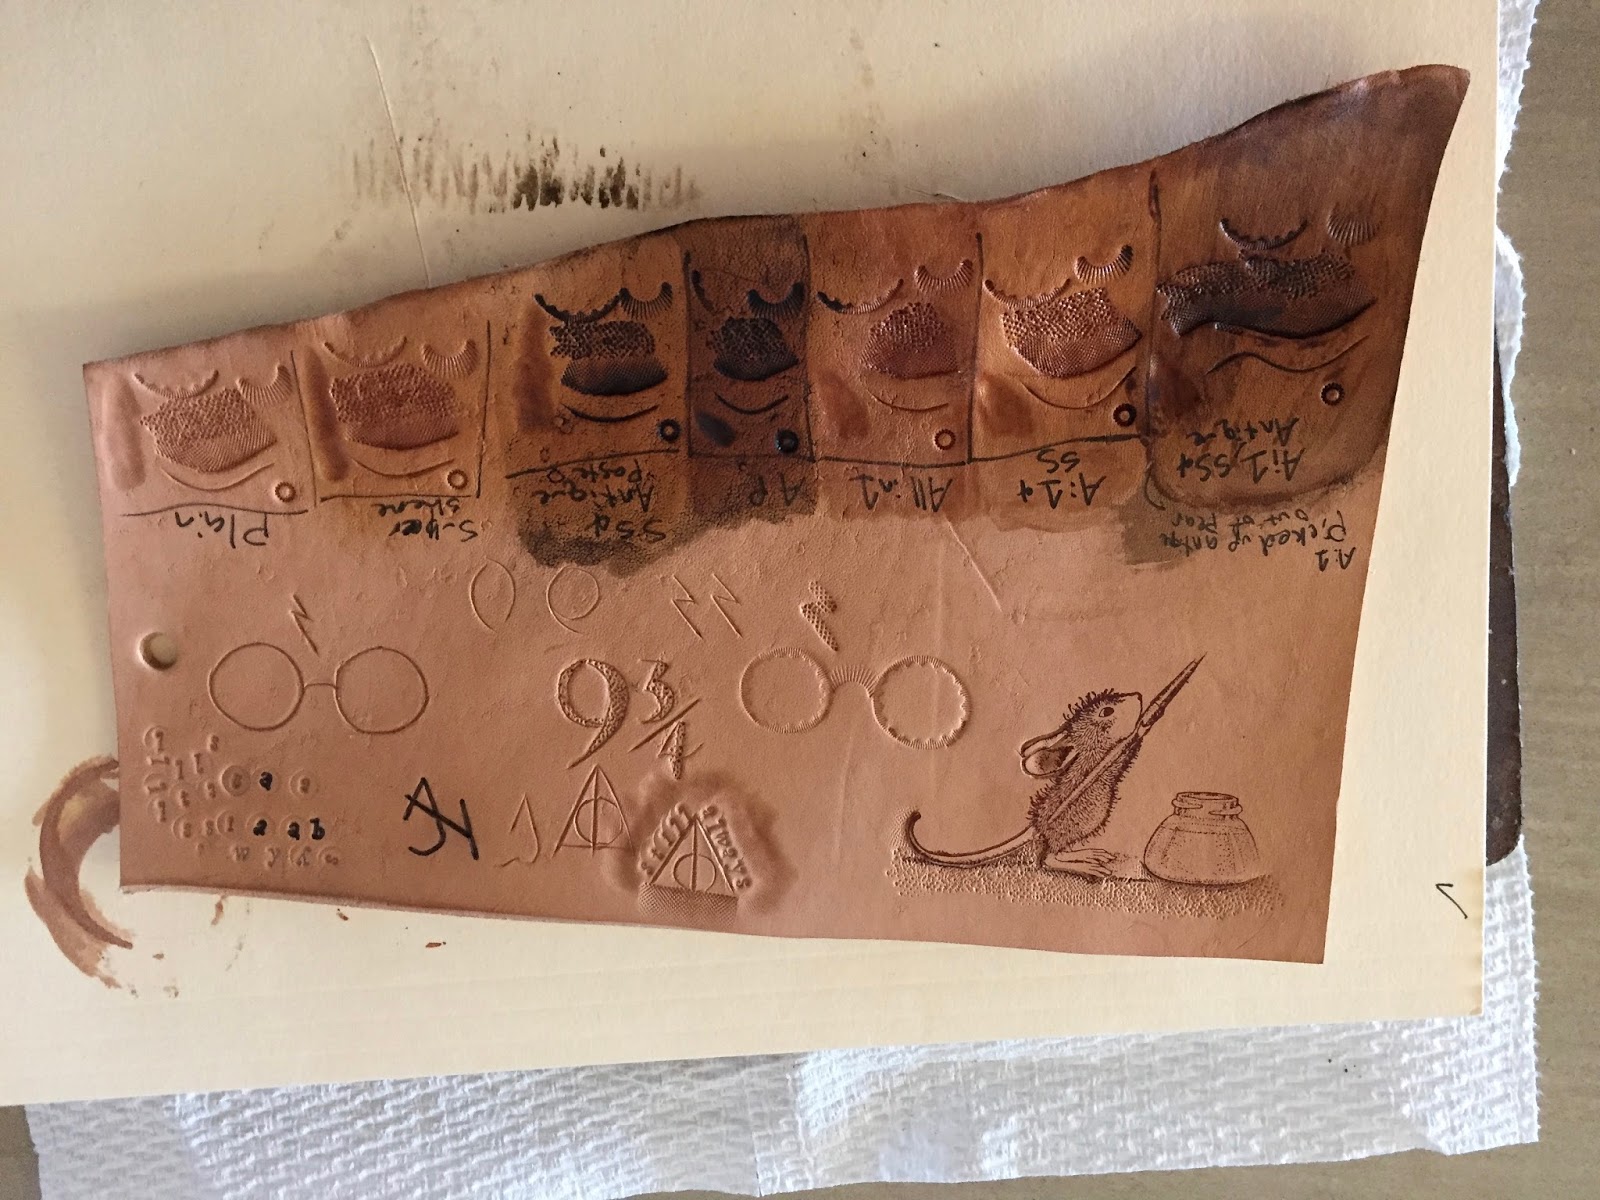
This is a test piece I did with the belly of some leather I bought.  The stamp was done with archival WATERPROOF brown ink.  The leather took it nicely.  I then did minimal tooling under the mouse just to see what it will look like.

On the other side I did testing to see what worked together.  In the left most section, I played a layer of Super Shene, then Antique Finish, then All in 1.  I might not have let it set totally but the All in One Stain and Finish lifted the Antique Finish right out of the pear shading.  Not Good.  I also labeled it with a fine tip sharpie marker and had no runs from any of the products
Below are some of the products I used for this project.  I get a small amount if you click on the link and purchase the product. However, I am not supported by any of the companies represented.


Wednesday, November 2, 2016

Dyeing and Finishing Leather Projects

Part two of the leather projects.  After carving, I went to the store and got colors and finishes.  The kit came with an all-in-one stain and finish but with would only produce a monotone.  I was looking for something more.

Celtic Bracelet - 4 coats of Eco-Flo Super Shene on the "ribbons" and 2 coats in the dots.  Fiebing's Antique Paste Medium Brown.  Fiebing's Leather Sheen, two coats and buffing between.


The light ribbon and 4 dots are where the Super Shene was painted on.  The dark areas are where the antique finish collected in the tooling marks.  The overall color of the leather is where the antique finish touched the untreated leather.  Overall, I am very happy with my first project.

"Mario" Key Fob - Eco-Flo Cova Color - I used white as a base coat for the star and the mushroom.  Three coast of yellow over the white in the star, then 3 coats of Super Shene.  Three coats of green over the white.  Two more coats of white in the white parts.  I used a drop of water to help them flow better.  Two coats of Super Shene over the tan part of the mushroom's face.  Three coats of Super Shene over the white and green.  I tried to avoid Super Shene down in the cuts, especially between the white and green, so that the next step highlights the cuts.


I also daubed the edges with the antique finish.  Later, I dampened the edges and used the burnishing tool to smooth the edges.  This is my new favorite tool!!


Below are some of the products I used for this project. I get a small amount if you click on the link and purchase the product. However, I am not supported by any of the companies represented.


Wednesday, October 26, 2016

New Possible Hobby

Miniatures is always my first love but lately I have been bitten by the leather working bug.  I have logged about 10+ hours watching how to videos on youtube and Tandy Leatherworking sites.  Here is what I have so far.

I found a starter set at a craft store for 40% off.  It came with a couple of practice pieces, and a couple of starter projects.  I didn't really care for the included patterns of I did one of them on the practice piece so I could follow the step by step instruction.  Then I went and found a patter I might actually wear on a bracelet.

Cool random pattern I found online.  I scaled it until it fit well on the bracelet blank included in the set.

Dampen the leather with sponge.  Technically, this is called "casing" the leather.  You wait for it to start to return to normal color.

Tape the pattern, but not on the leather.  Leather doesn't like tape.

Use a ballpoint pen or other smooth tool to impress the design in the damp leather.

Cut the pattern into the leather using the swivel knife.  There is a great instructional video on the Tandy website on how to hone and use the swivel knife.

I used the bevel tool at each intersection to make it look like the bands were going beneath each other.  I used the seeder in each middle joint.  I used the backgrounder in the negative space.

I went ahead and used the bevel on the outside of the design.  I could have left it as it was.

This is the key ring fob.  I found the 2 patterns online.  I think they were coloring page designs.  I cut them in, beveled around the edges, and used the backgrounder to make the eyes.
The kit I got only has one color of dye and I am waiting until I can get a 2-tone effect to complete them.  Not bad for a first attempt!

Below is the link to the starter kit I used. If you click on the link and purchase, I get a small fee.  However, I am not supported by any of the companies mentioned.

Label Cloud

Mini's Past